7. Producing Sign Language Videos
Recommended Equipment for Studio Setup ITEMS QUANTITY DESCRIPTION Professional Digital Camera 1 1920 x 1080 Resolution Lighting system 4 Main, Flat...
Recommended Equipment for Studio Setup
ITEMS
QUANTITY
DESCRIPTION
- Professional Digital Camera
1
1920 x 1080 Resolution
- Lighting system
4
Main, Flat, Filler, and Rear
- Camera tripod
1
Standardized camera mount
- Green Screen
1
9 x 10 feet backdrop
- Professional microphone
1
Dynamic microphone
- A set of headphones
1
Professional semi-open microphones
- Microphone stand
1
free-standing mount for a microphone
- Editing software
1
Adobe Premiere Pro
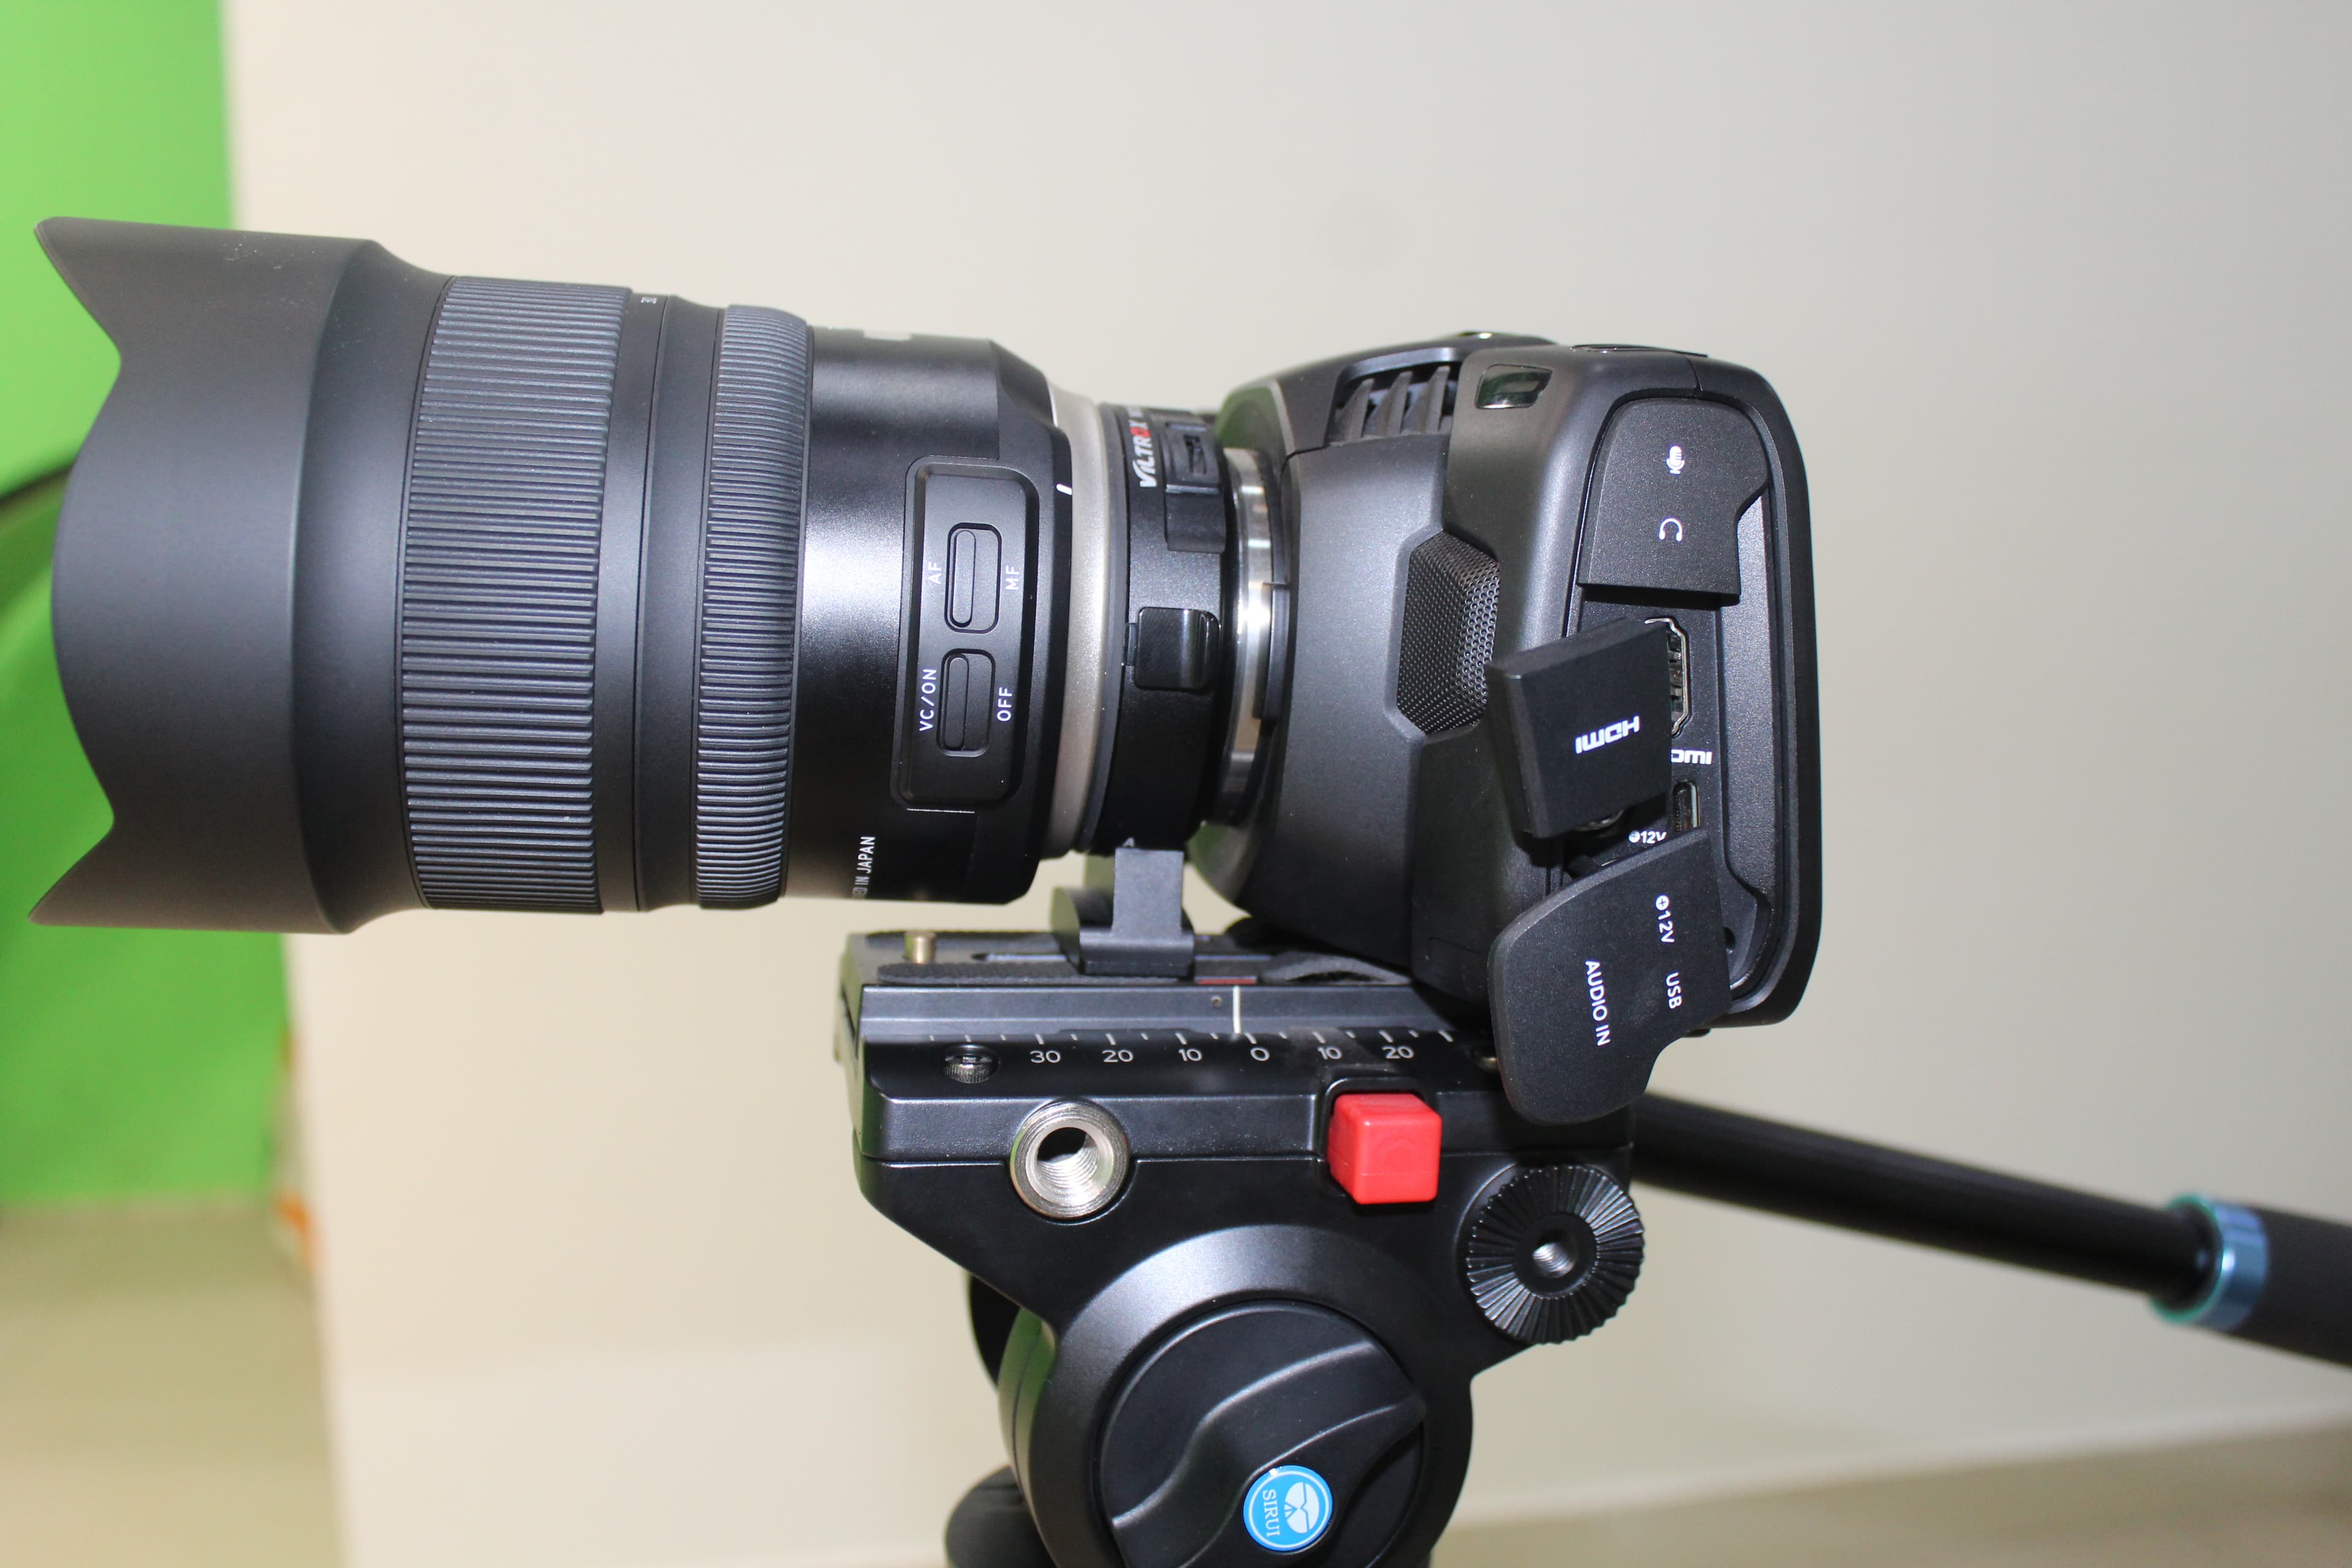
- Camera format
- The camera should be digital, because of its superior ease of use, quality, and edition.
- The camera should have at least 8 GB of storage.
- It should be a camera that can film in high definition, HD: The exact quality to be used is decided in post-production, but for editing purposes, it is crucial that the filming is as high quality as possible.
- The camera should preferably have a manual configuration.
- The camera should preferably have a manual lens.
- The camera should preferably have an automatic or Manual White Balance.
Image showing the Camera format
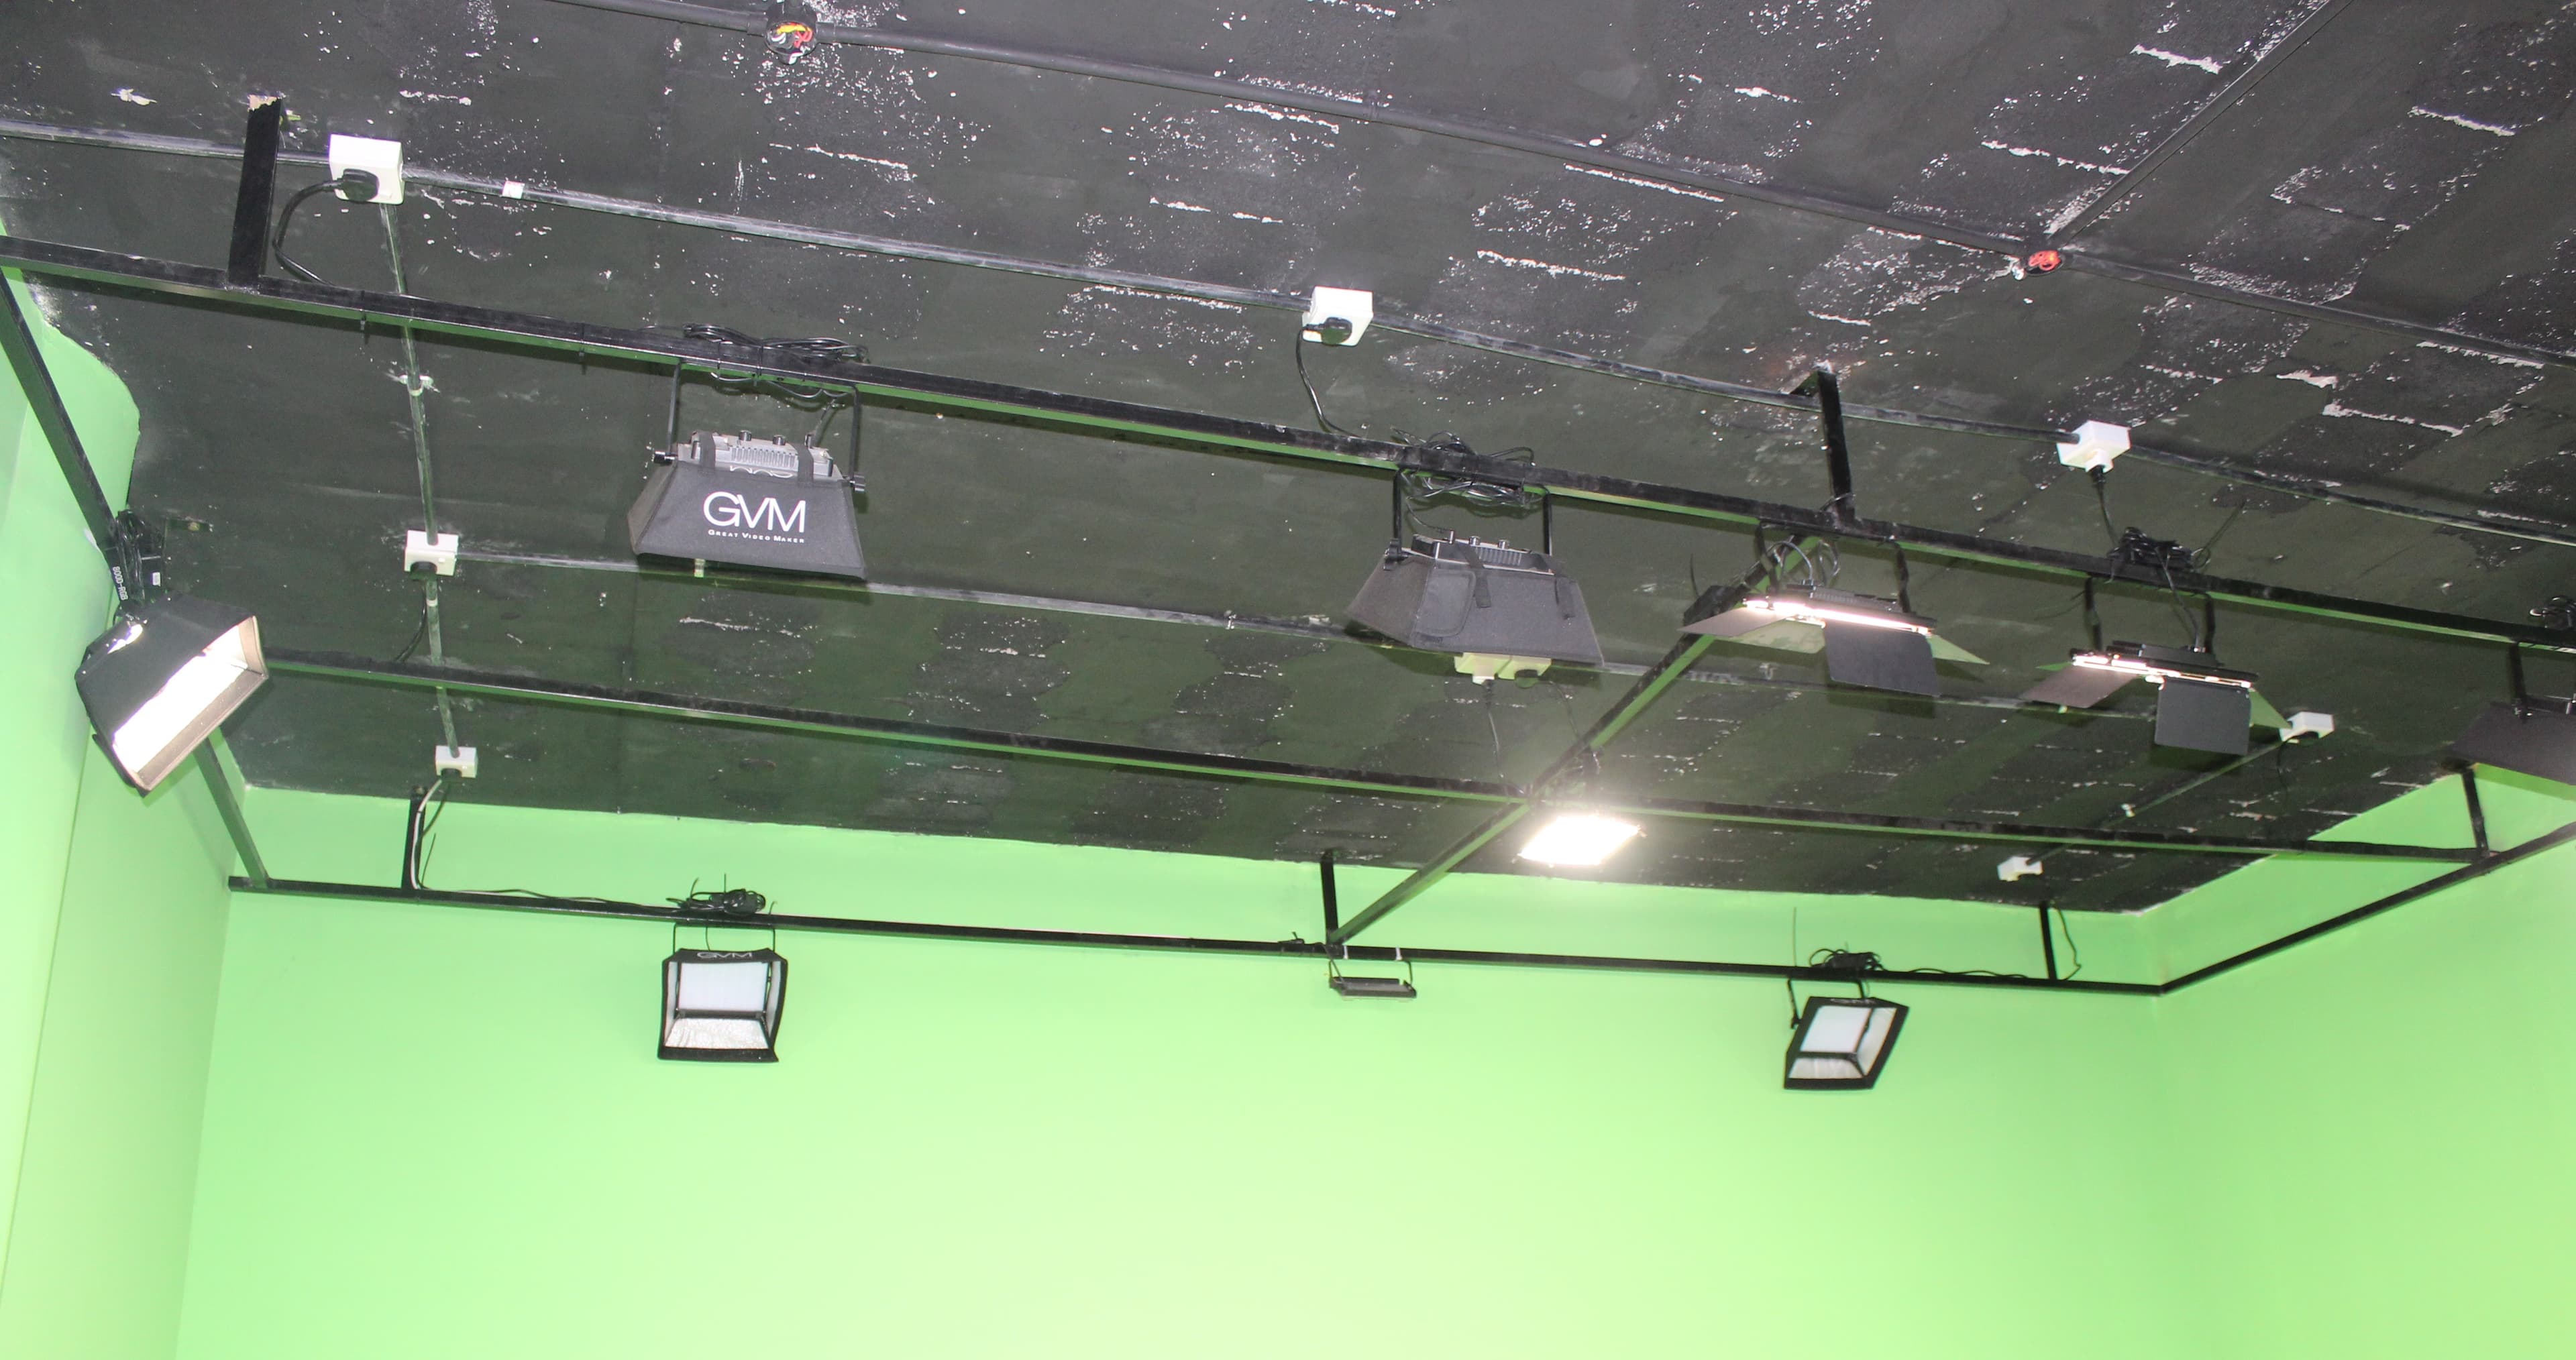
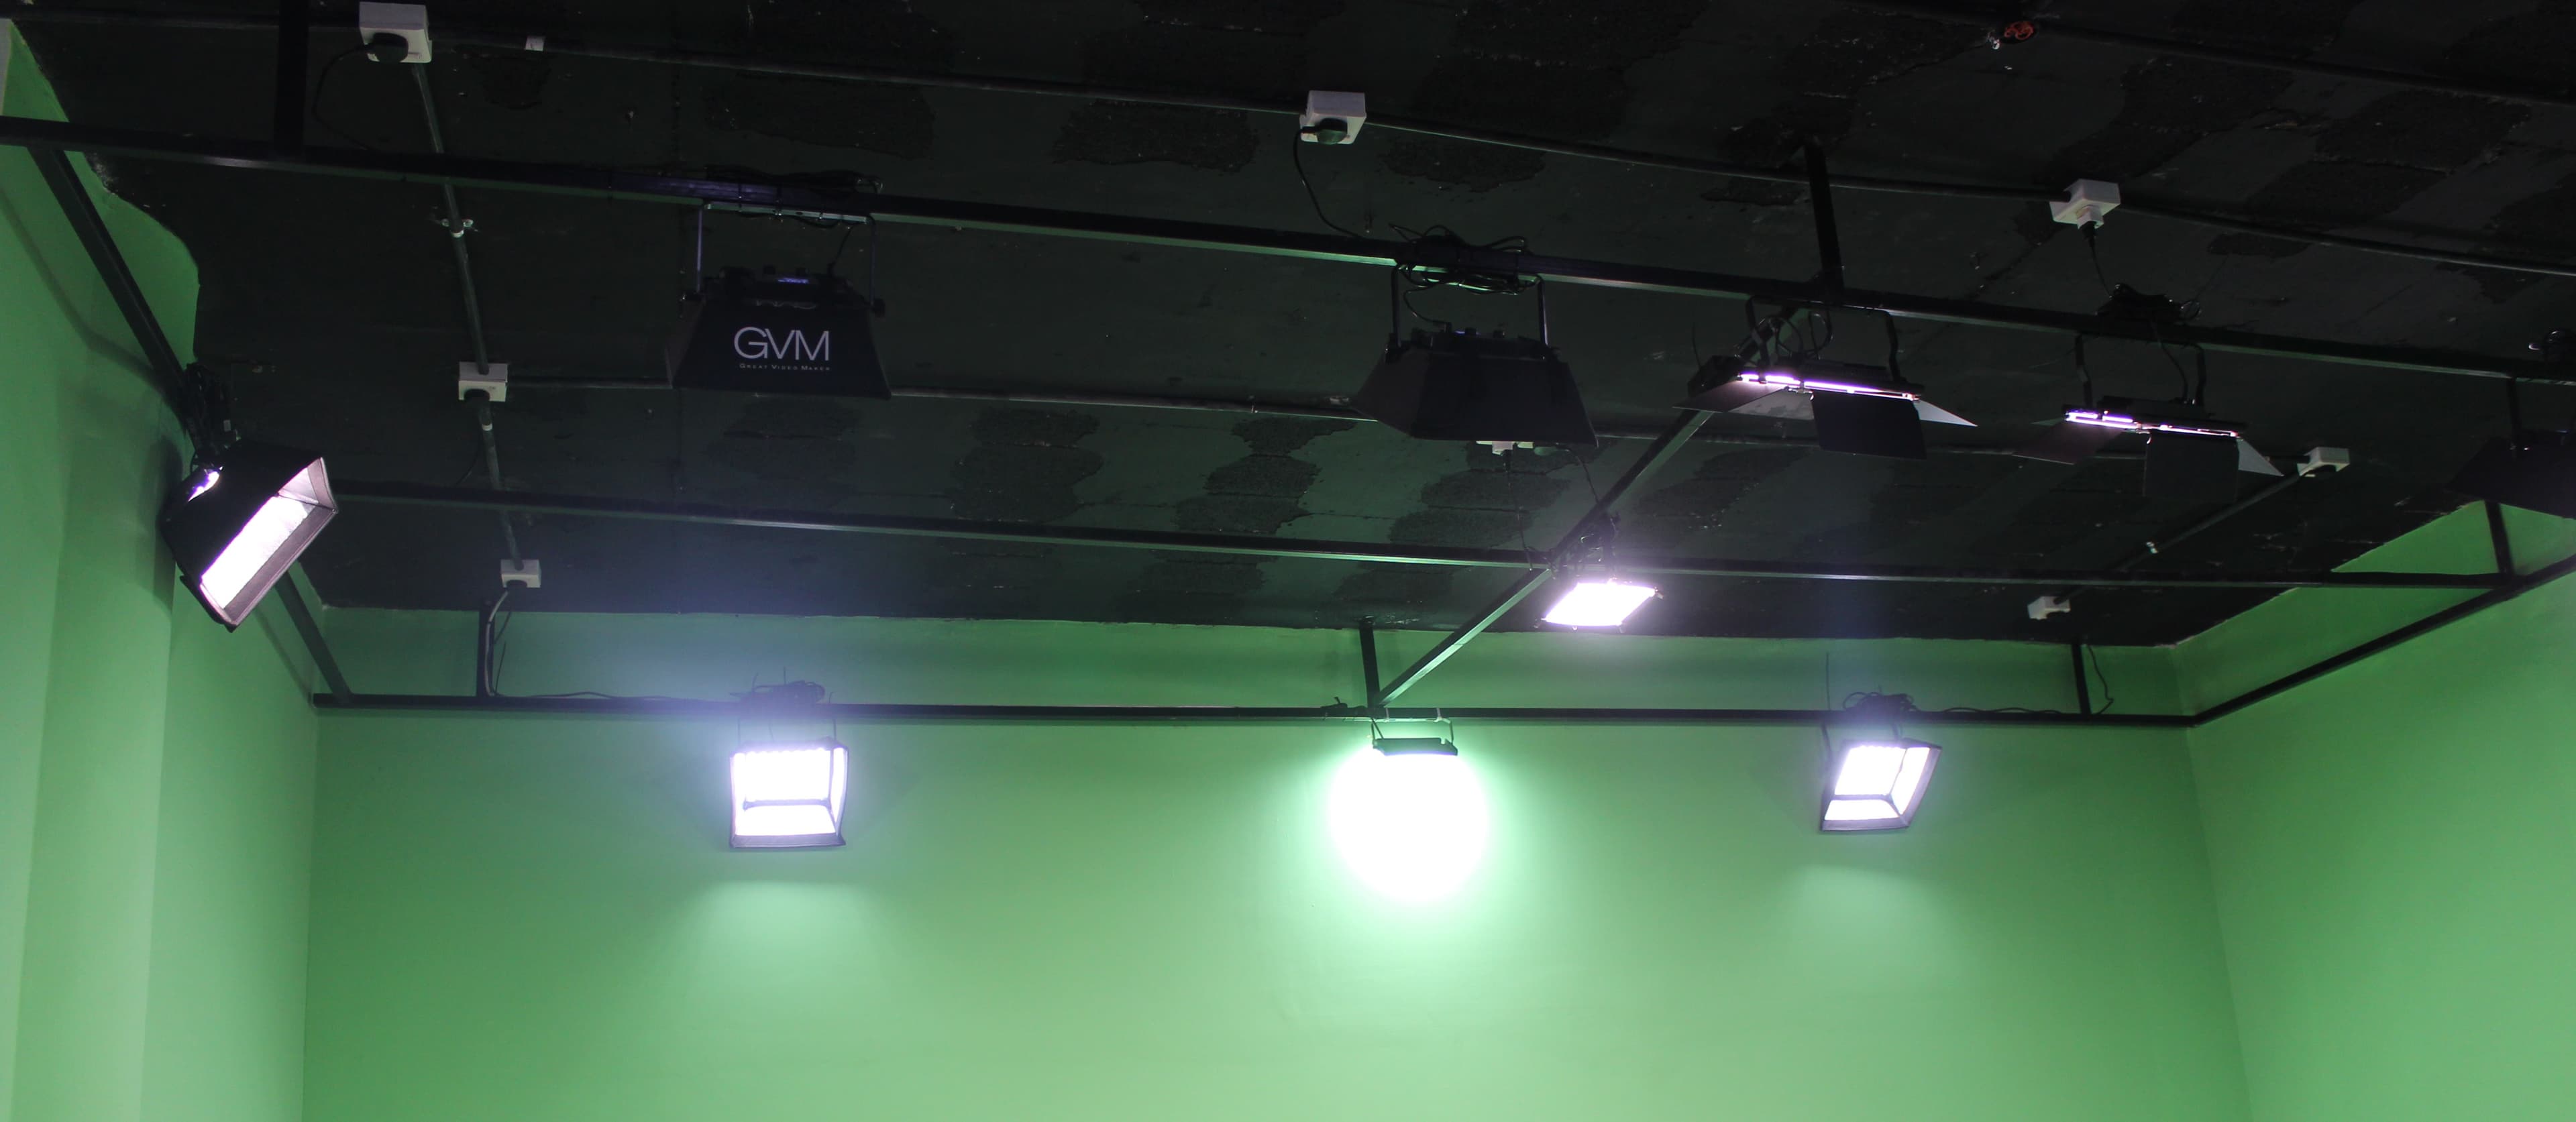
- Lighting system
- Point lighting
- The main light is positioned about 45 degrees right or left of the subject and 45 degrees downward, pointing to where the face and torso are located.
- A filler light is located behind and opposite the main light, at the height of the camera,
- Rear light that is slightly above the subject, shining back to the screen or chroma
- Flat lighting
- Two lights are positioned behind the camera, in opposite directions, in order to cover the entire surface and eliminate shadows.
Image showing the Lighting System
- Sound Recording
- The recording of the voiceover should be in WAV format, which provides the best audio quality
- The recording should take place in a recording studio or in a controlled environment that is acoustically desirable and isolated to reduce background noise.
- The microphone should be a high-sensitivity digital microphone, preferably unidirectional
- Closed or semi-open headphones
- Microphone stand: this makes the work easier and helps avoid vibrations
- Editing software such as Audacity will be used
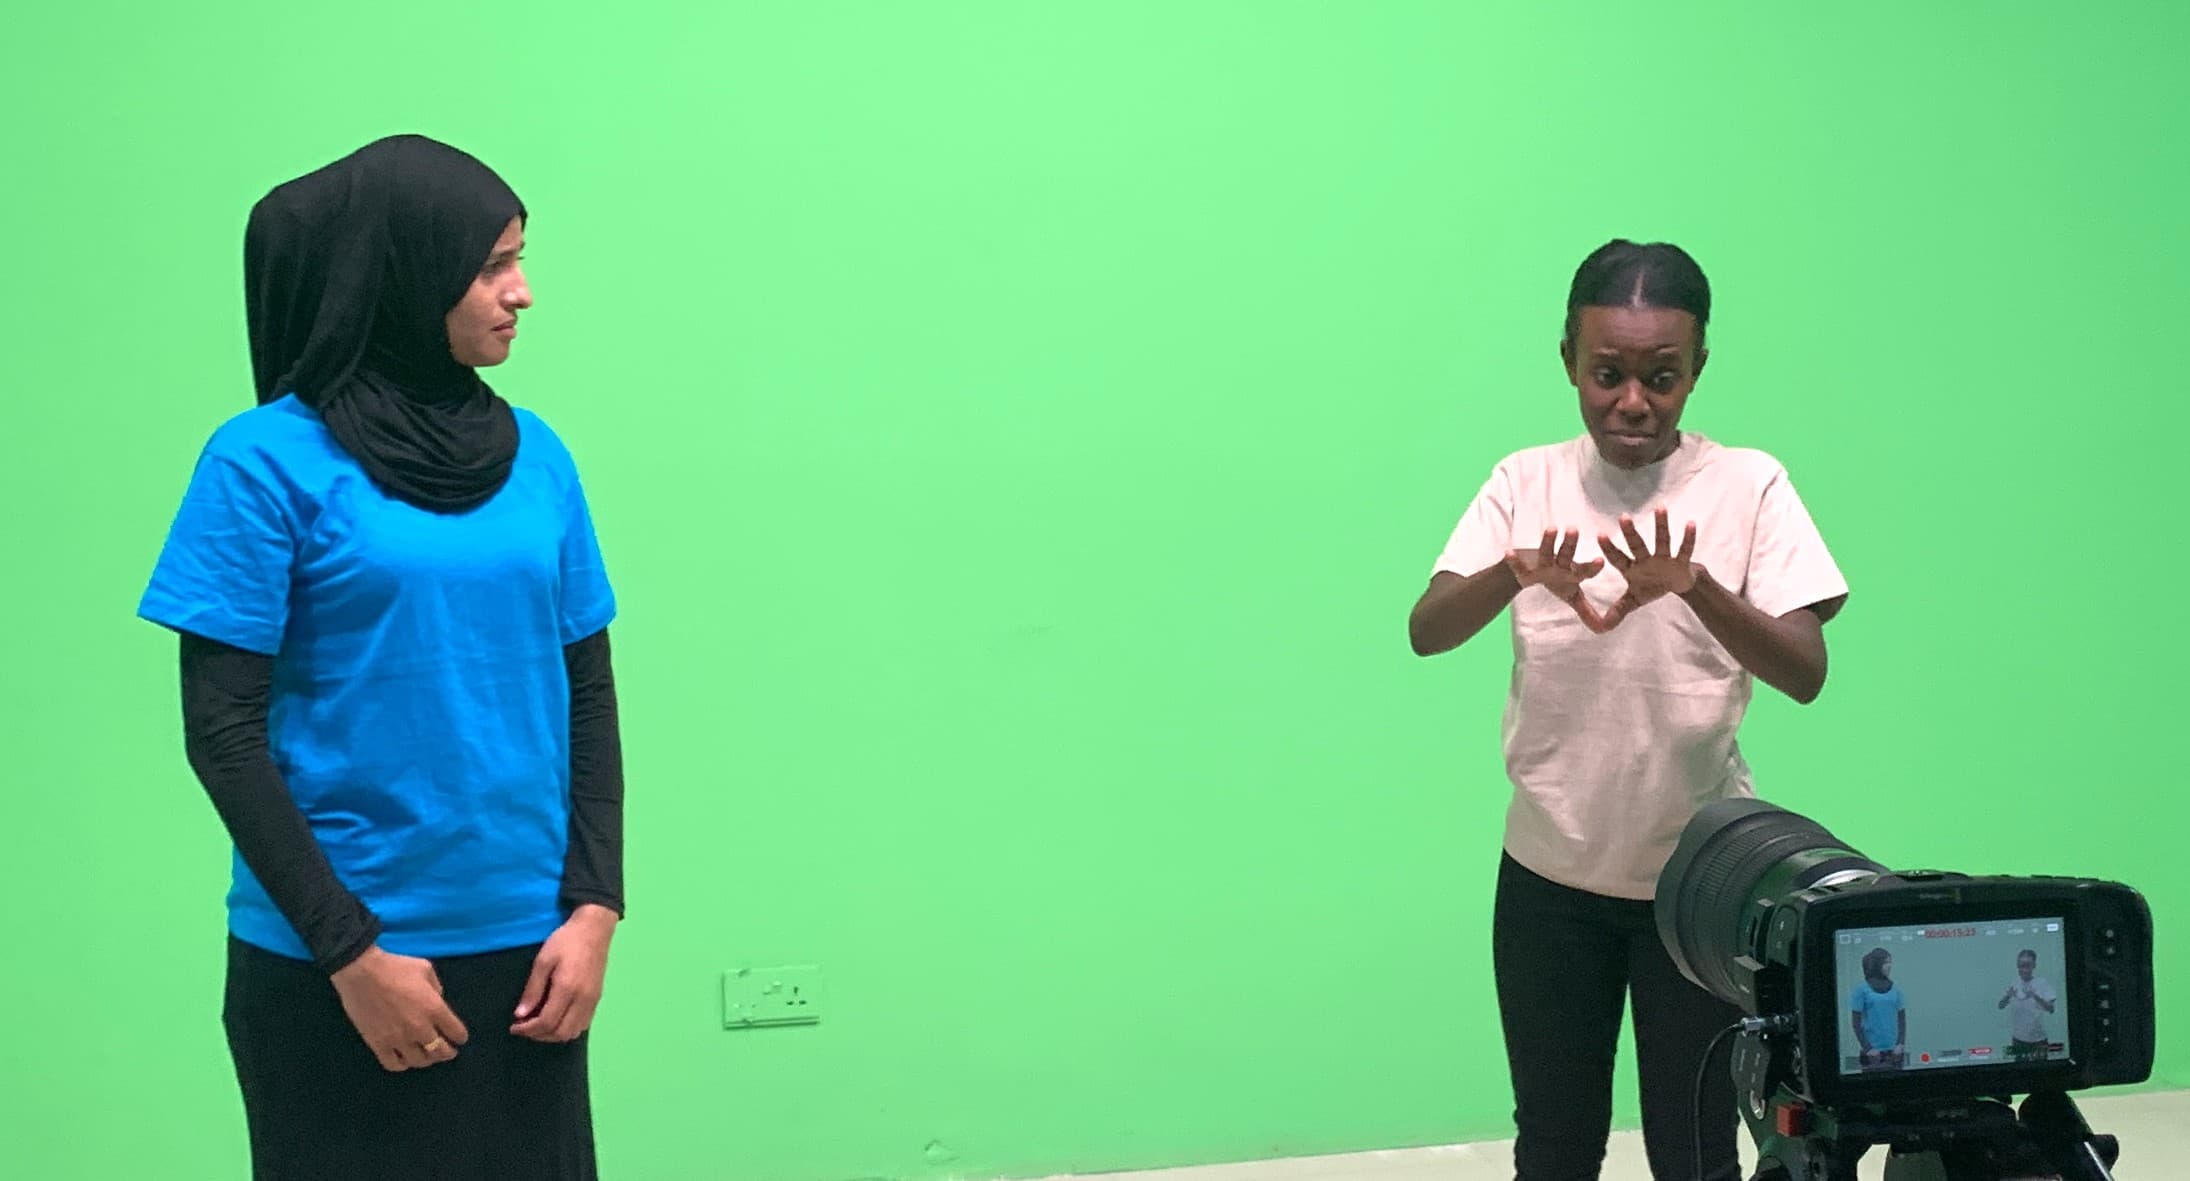
Image of the studio showing the necessary distances
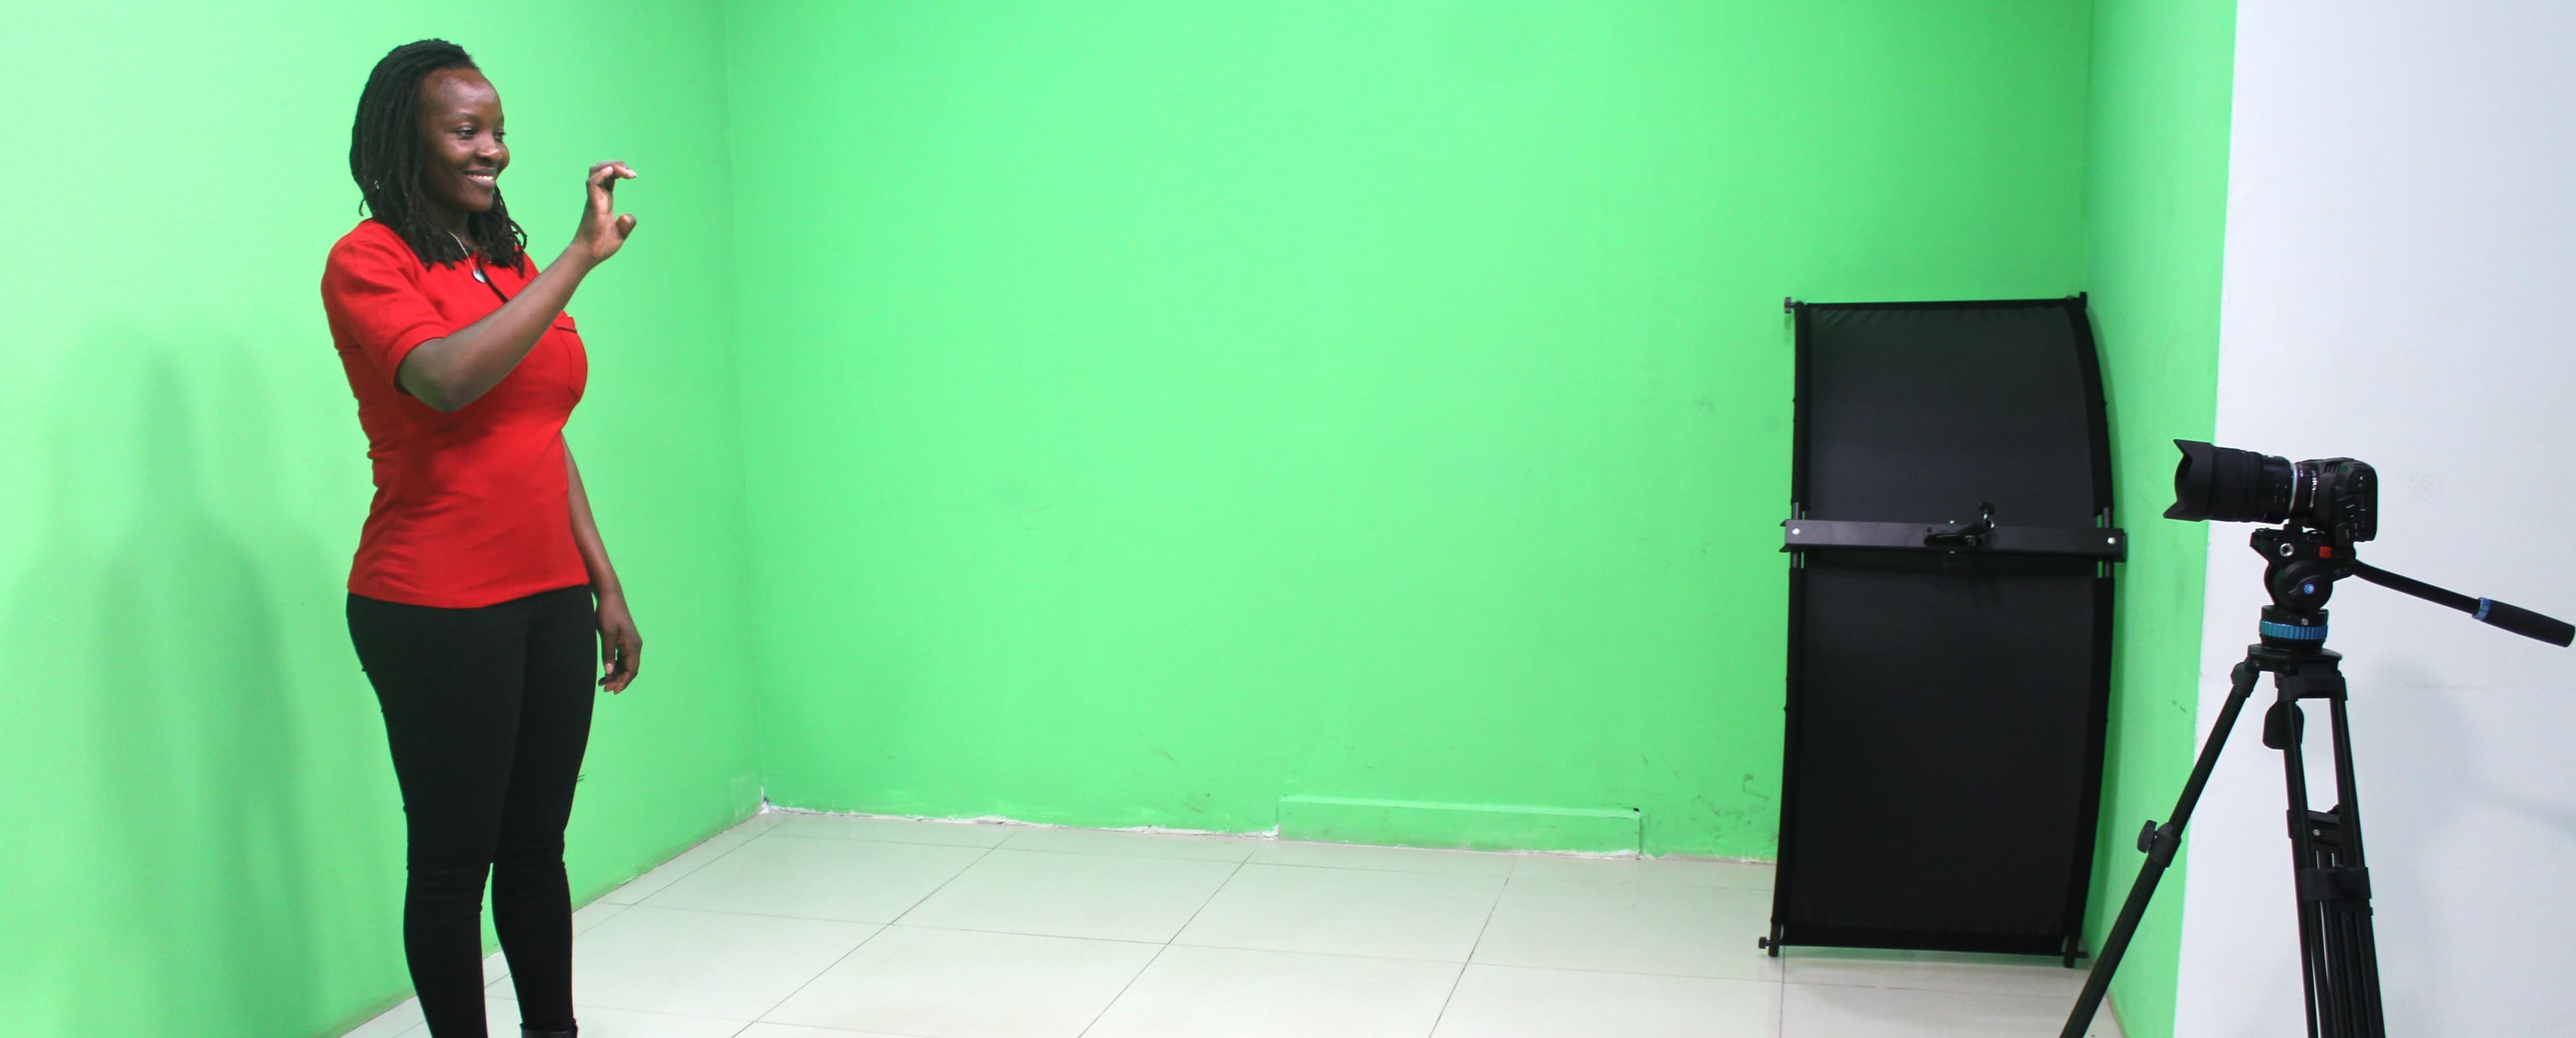
- The camera and the signer 6 meters
- The reflectors and the camera 5 meters
- The green screen and the camera 7 meters
- The screen and the signer 3 meters
- Video editing
- The video has a voice-over, which can be turned on and off.
- The voice will accompany the sign language, not the text.
- The duration of each film block is calculated and then used to time the voice recording, which should last about the same as the sign language block.
- In the case of literary texts, the voice-over will accompany the written text.
- In the case of storytelling, a voice-over accompanies the narrator.
- The team will convene persons to put their voices to the text or story.
- A detailed timeline will be developed by the reader and the sound engineer.
- Each reader will practice reading according to the speed of the sign language narration.
- The reader must agree to the use of his or her voice.
- During the recording, an assistant will make sure that the reading of the text, the pronunciation, intonation, and timing are adequate.
- The sound engineer edits the voices and sends the files to the coordinator, who checks them before sending them to the editor
- Packaging
- DVDs
- EPUBs - early grade template is located in Github
- Online
- Flash Drives
Image showing the end product: EPUB for the video
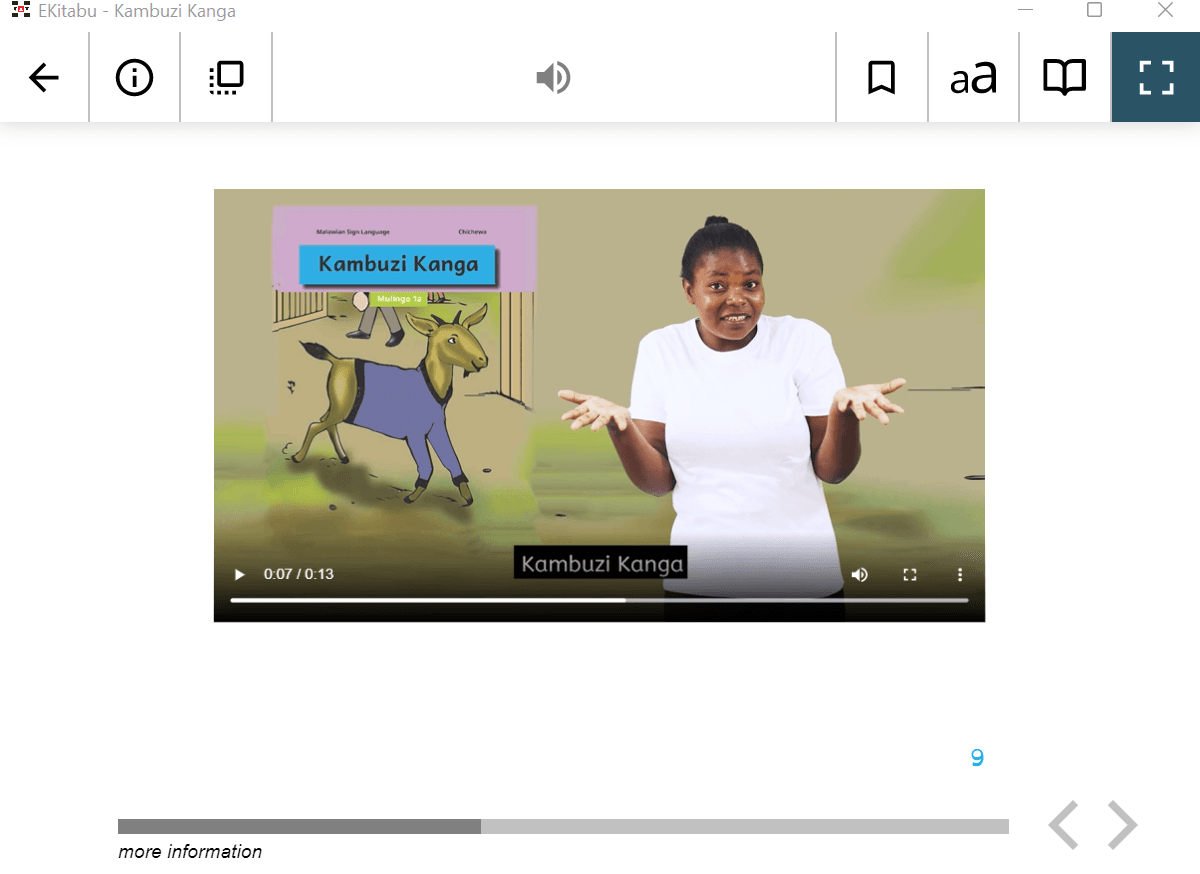
Image of the Signer, Background, and the text caption
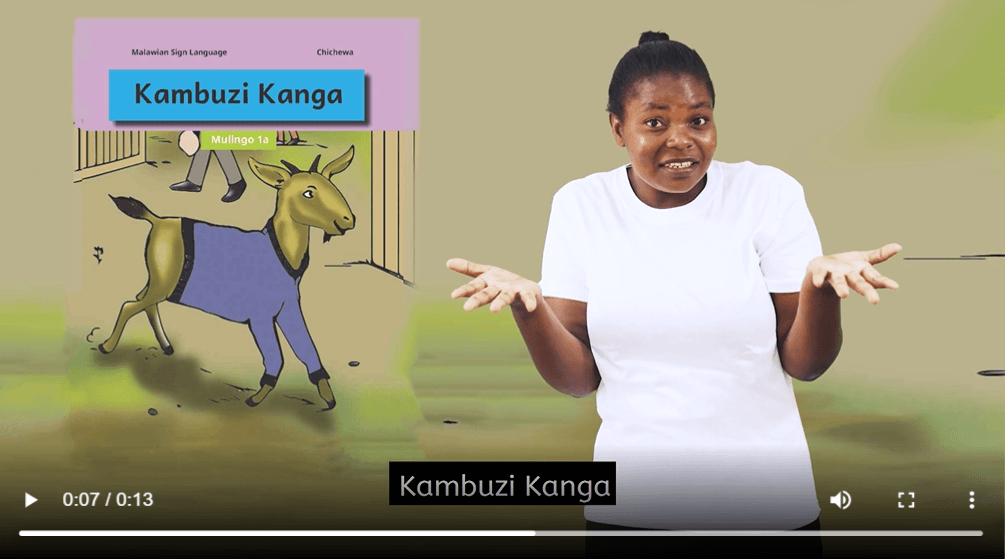
- Signing Actor
- The clothing used by the actors must be one color, either black or white, depending on the skin color of the presenter
- The clothing or the hair must not interfere with the clear understanding of the signs and during editing
- High contrast between the signer’s hands and the video background-color
- Caption text
- Make subtitles optional for the videos, i.e. that the videos can be watched with or without subtitles.
- Color: White fill, Black stroke, and large font
Image from original PDF book

How to extract the image and add it to the video:
- Open the PDF in Acrobat, and then choose Tools > Export PDF
- Click **Image and then choose the image file format that you want to save the images in.**
- JPEG
- NPG
- Click **Save to save only the images from the PDF to the selected file format**
- Place the image in the video
×