Step 3: Digitize It
Digitize! Let's get your book into digital format. Our goal in this step is to create two things: A text file with all of the text from your book. ...
On this page
Digitize! Let's get your book into digital format.
Our goal in this step is to create two things:
- A text file with all of the text from your book. Here's an example text file. Keep track of what page the your text is on:
Page 1Kariza yakundaga kubaza. Uwo muco yawukomoye ku babyeyi be.Bakundaga kumubwira bati: "Nutabaza ukiri muto, uzasaza utamenye."Page 2Umunsi umwe, Kariza yabajije mwarimu ati: "Kubera iki buri gihe ababyeyi bacu badutegeka gukaraba intoki mbere yo kurya, n'ubwo zaba zisa neza?"Bagenzi be bishimiye icyo kibazo. Na bo ntibakundaga kubwirizwa gukaraba.Page 3Nuko Mwarimu aramusubiza ati: "Ubajije ikibazo kiza Kari. Burya n'ubwo intoki zacu tuba tubona zisa neza, hari ubwo ziba ziriho udukoko tutagaragara."Mwarimu akomeza gusobanura ati: "Utwo dukoko dutera indwara kandi ntituboneshwa amaso yacu. Hari ibikoresho byabugenewe byifashishwa mu kutureba."
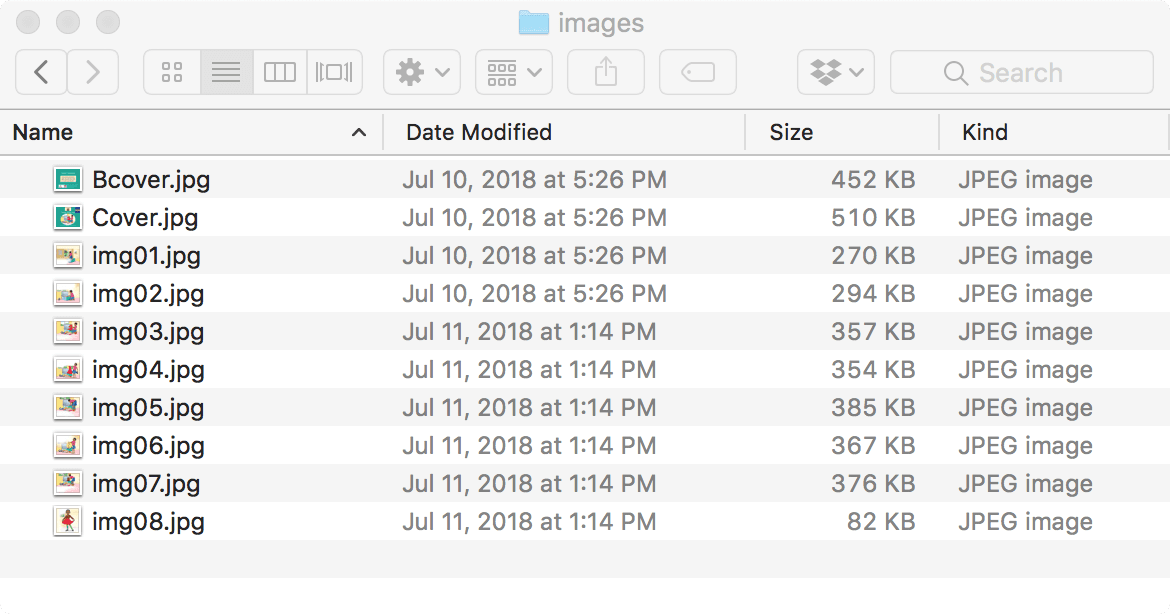
- A folder with 1 separate image file for each illustration or photo in the book. Your goal is to create a folder on your computer with all of the images from the book, including the front and back cover. The final result should look like this:
The best way to create the text file and image file varies by where you are starting. Read through the examples, below, and choose the case that best fits where you are starting.
Born Digital, Born Accessible - if you are creating a new book with digital files
As you are creating your book, organizing your the files will make it easy to create an accessible EPUB.
- Text: Save a copy of your final text as a Word or text file.
- Images: Save a copy each image file into a folder names "Images"
- Re-name your images "cover.jpg" for the front cover, "bcover.jpg" for the back cover, and "img01.jpg", "img02.jpg" sequentially as you go through the book.
- We recommend sizing images no larger than 800 x 600 pixels at 72 DPI.
That's it!
Working from a PDF that was sent to the printer
Most of the content developers we work with create EPUBs from PDFs that were sent to a printer to print their book.
To start, open the PDF using a PDF editing tool. The easiest tool to use is Adobe Acrobat "Pro" or DC - the free Adobe Reader will not work. If you don't have Adobe Acrobat, we recommend LibreOffice Draw, which is open source and free. See Resources & Software. The instructions, below are based on Acrobat DC.
You may have more than 1 PDF file for your book. If that is the case, follow the next step for each PDF file.
- #### Create a text file.
- Open your PDF in Acrobat DC
- Go to the File menu, then select Export To, then Microsoft Word. Save the file.
- Create a new, blank Word file.
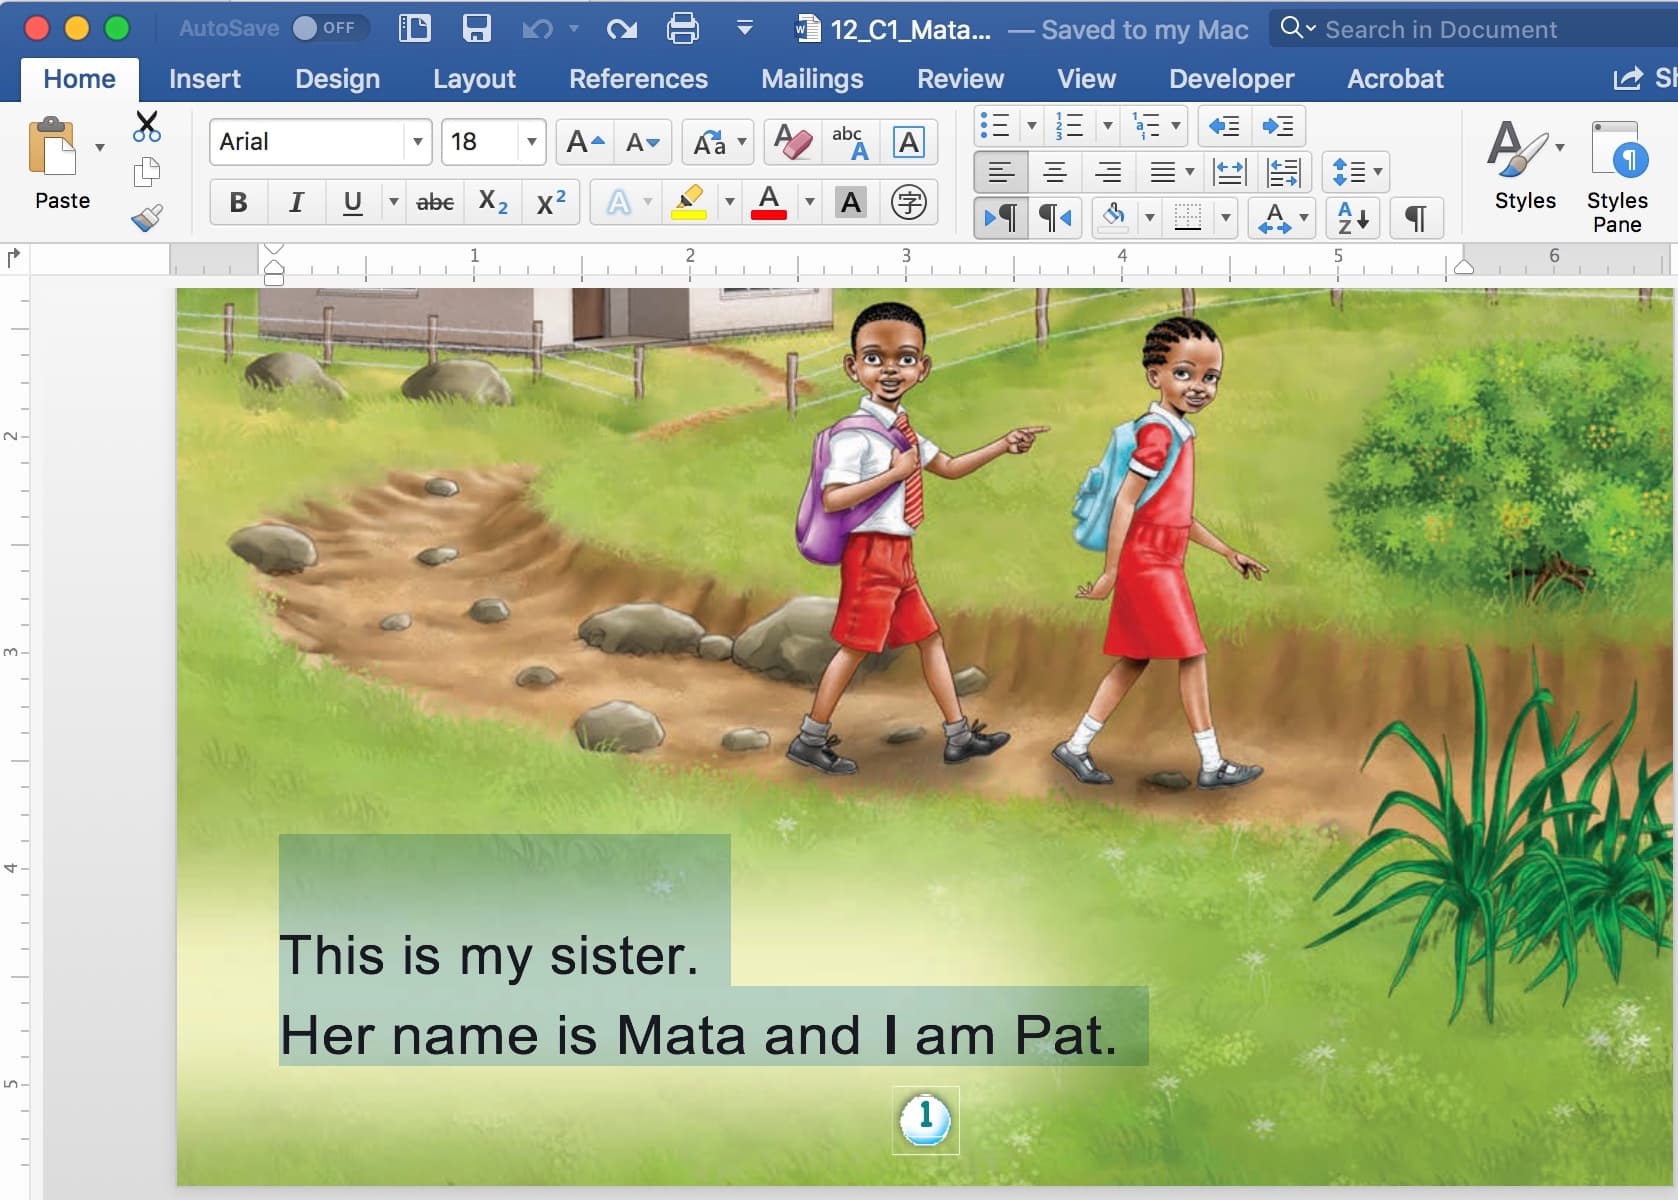
- Open the Word file. If you can highlight the text, copy it page by page and paste it into your new blank file. Text you can highlight will look like this:
- Sometimes text does not copy cleanly into the new file. You should check for:
- Special characters not copying properly
- Multiple spaces between words
- Extra link breaks between sentences or paragraphs
- Carriage returns or line breaks inside sentences that span two lines.
- If you cannot highlight, then copy and paste your text, you will need to re-type the book, as in the case of a printed book. Follow the instructions for Working from a Printed Book, below.
- #### Export and edit your images:
- We find it helpful to keep the printed or marked up copy of your book from the Design It stage on hand as you work through digitizing your images.
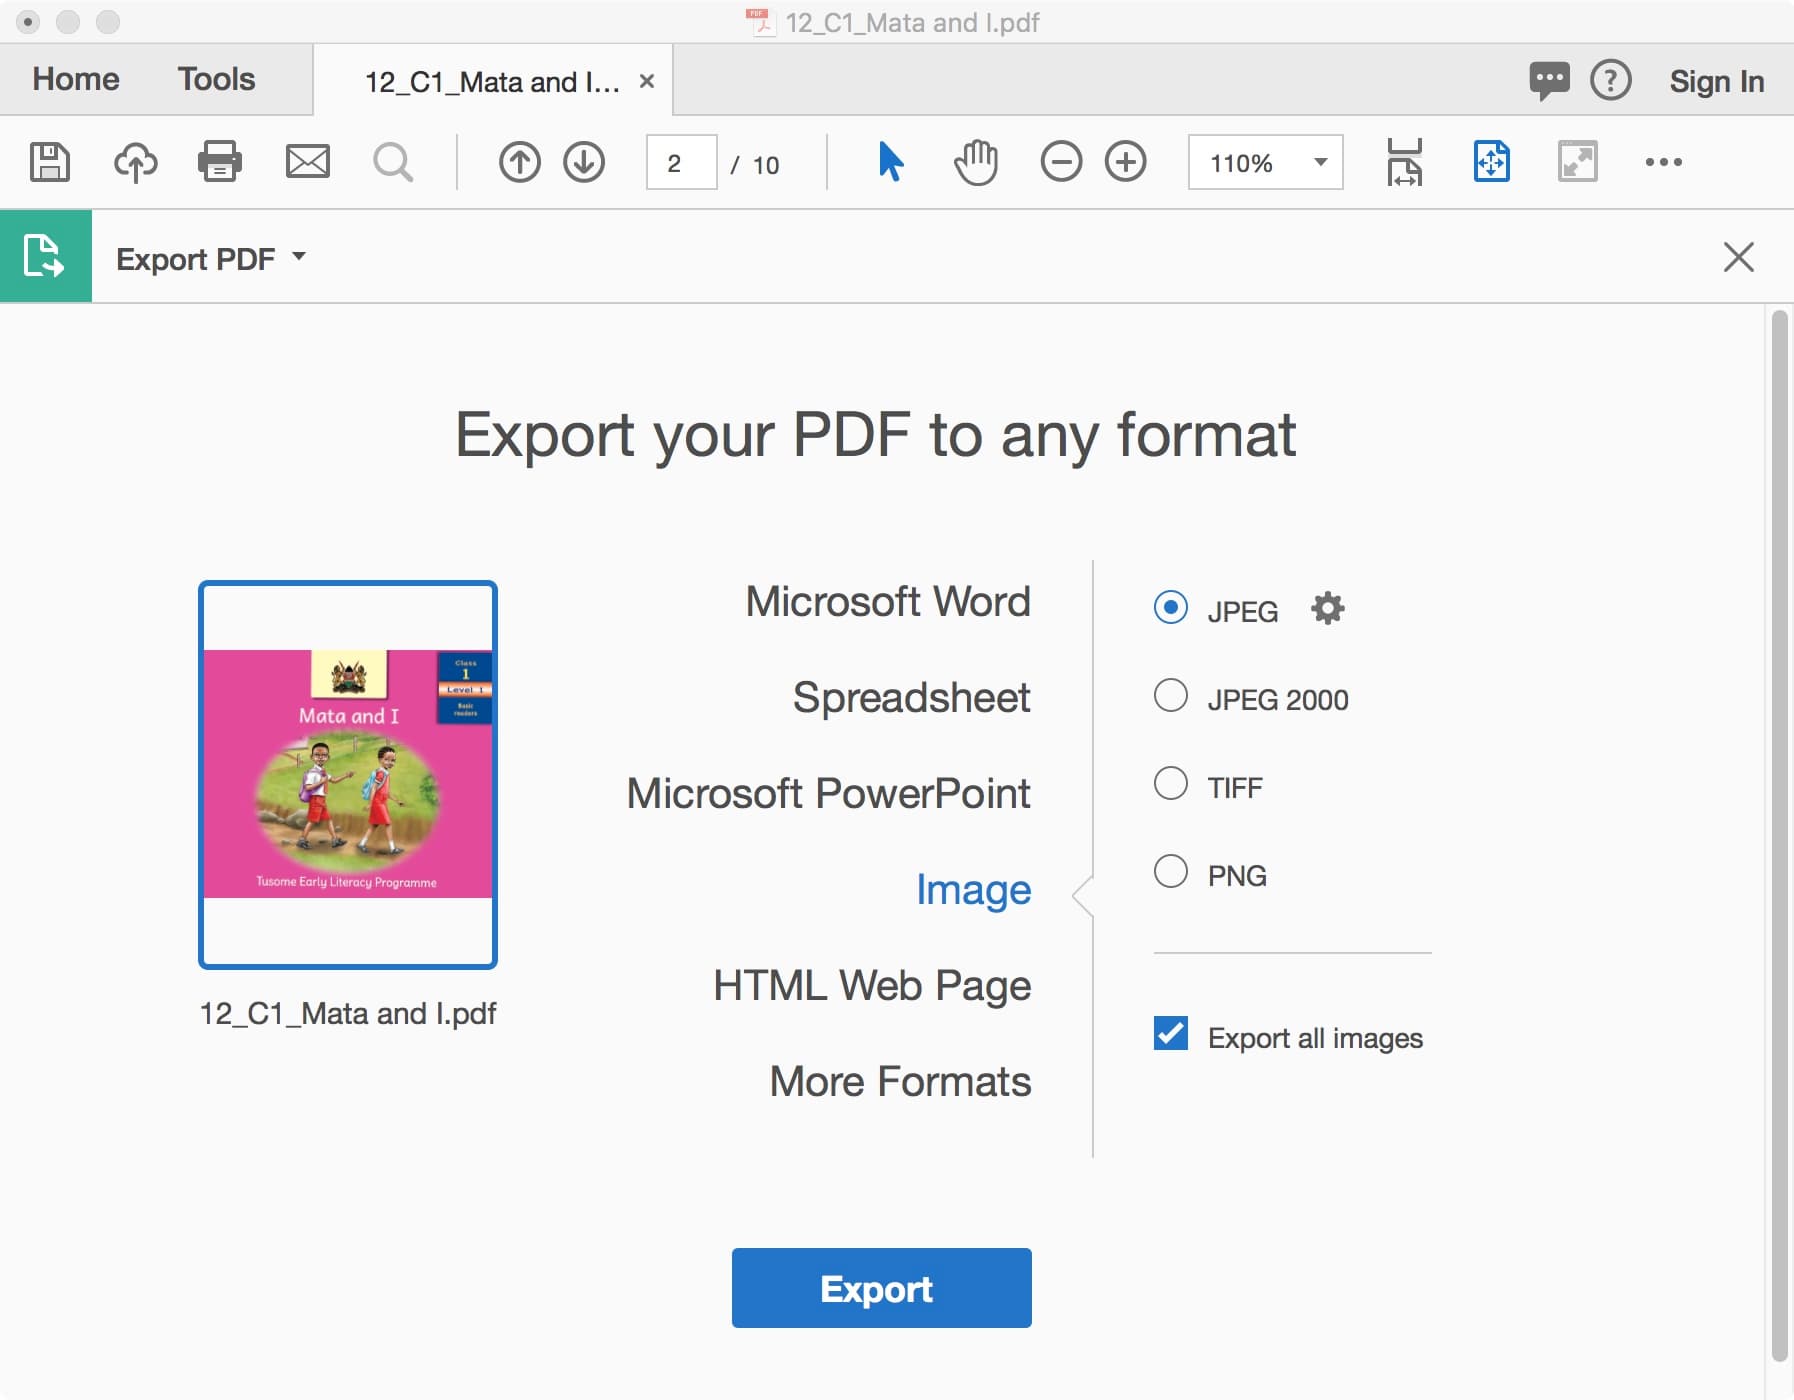
- Open the PDF. In Acrobat, click on "Tools" then "Export PDF"
- In the Export PDF tool, choose "Image" and then check the "Export all Images" box. When you click "export" all of the images will be exported into a folder you choose. Acrobat will ask for a folder and location for the images. Given the EPUB format requires a folder named "Images," create a folder called /images, the click Save.
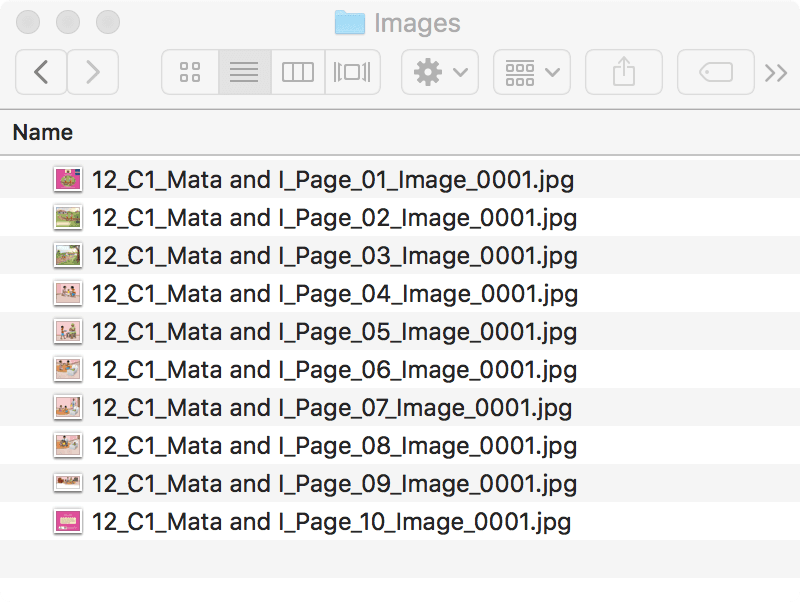
- Acrobat will automatically export the images into one folder. The individual image files will be named: PDF file name _ Page Number _ Image number.jpg.
- Because print requirements are different from EPUB image requirements, most likely, some image touch ups and reformatting will be required. Here are some common issues and solutions to make them accessible:
- Front and Back Cover: We need to create 1 image for the front cover and 1 image for the back cover.
- If you have a separate PDF file with the front cover, spine, and back cover as 1 image
- Crop out the front cover image using your favorite image editing software. (See Resources & Software if you need a recommendation.) Save the front cover image as a new file, named "Cover.jpg"
- Crop out the back cover. Save the back cover image as Bcover.jpg
- Internal images: Again, the goal is to create 1 image file for each illustration or photo in your book. Some images designed for print will require editing to work in an accessible EPUB:
- The text of the book is actually drawn as an illustration. In this case, we suggest you crop out the section of the illustration where the text appears using image editing software. You will need to use your judgement on how best to crop the image.
- Images that span a 2 page spread (across the pages of an open book.) In this case, create 2 new image files from the two page spread.
- Headings - chapter titles, exercise titles, etc - that are illustrations, not text. These will need to be converted into text. Type them into your text file and delete the images.
- Logos, and other images that may appear on the title page or elsewhere in the book. These also need to be included in your /images folder. Simply save them as images.
- Rename the images in your /images folder
- Go through all of the images in your /image folder.
- Check that you have properly named the front cover "cover.jpg" and the back cover "bcover.jpg"
- Check that the images from the internal pages of your book are names in order: img01.jpg, img02.jpg, etc. For reference, you are trying to create a /images folder that looks like this:
Working from a paper book
If you are starting from a paper book, we need to create a text file, and a folder of digital images.
- Create a Text File
- For early grade readers and story books, simply re-type the book into Word or a text editor. This will only take you a few minutes for a 20 page story book. It is best to keep track of which page your text is coming from. Your Word or text file should look something like this:
> 1. Page 1 > > Kariza yakundaga kubaza. > > Uwo muco yawukomoye ku babyeyi be. > > Bakundaga kumubwira bati: "Nutabaza ukiri muto, uzasaza utamenye." > > > > > > Page 2 > > Umunsi umwe, Kariza yabajije mwarimu ati: "Kubera iki buri gihe ababyeyi bacu badutegeka gukaraba intoki mbere yo kurya, n'ubwo zaba zisa neza?" > > Bagenzi be bishimiye icyo kibazo. Na bo ntibakundaga kubwirizwa gukaraba. > > > > > > Page 3 > > Nuko Mwarimu aramusubiza ati: "Ubajije ikibazo kiza Kari. Burya n'ubwo intoki zacu tuba tubona zisa neza, hari ubwo ziba ziriho udukoko tutagaragara." > > Mwarimu akomeza gusobanura ati: "Utwo dukoko dutera indwara kandi ntituboneshwa amaso yacu. Hari ibikoresho byabugenewe byifashishwa mu kutureba." >
- Proof read the text, then you are done!
- Create Image Files: To create the images, you will need to use a scanner or take snaps of the pages with your smart phone. Then, you will crop out the individual images from the scans
- Scan you book
- If you have a spare copy of the book, and you can cut out the pages or cut off the binding - without hurting yourself or damaging the pages - we suggest you do that. Getting the pages as flat as possible improves the final images.
- If using a scanner, if the book is in color, set the scanner to 300dpi color output to a .jpg image file format. If the book is black and white, with only line drawings, set the scanner to 400 dpi black and white. Make a test scan of 1 page. Open up the resulting image on your screen and use your judgement about whether or not the results looks good. The way a scan looks depends on interactions between the paper, the way the images was printed, and the scanner you are using. Sometimes a lower resolution (dpi) scan will create a better looking final image. Try a few settings. Once you have a result you are happy with, processed to scan the entire book.
- If use a smart phone, the two things that will most impact the quality of your images are how straight you can get the phone lined up with the page and the lighting. Try your camera's flash. Also - you do not need to get a photo of the entire page, just the illustrations or images. Again, you may need to experiment a bit. Once you get a result you are happy with, take snaps of the entire book.
- Crop and save individual image files.
- Similar to working from a PDF (above) our goal is to create a /images folder with individual image files. The output should look list this:
- Save the front cover as "cover.jpg" the back cover as "bcover.jpg"
- Using your favorite image editing software, crop individual images from your scanned pages, or the photos of the pages from your smart phone.
×